Do you want to learn how to schedule Instagram posts in 2025? It's not as hard as you might think! In this blog post, we will discuss a few different methods that you can use to get the job done. We will also talk about some of the benefits of scheduling your posts ahead of time. So, without further ado, let's get started!
Why should you schedule Instagram posts?
There are a few reasons why you might want to consider to schedule posts on Instagram posts ahead of time. Instagram scheduling tools help you achieve so much by scheduling Instagram posts ahead of time. Here are some of them:
Saving your time
Because there is so much to do, maintaining your publication schedule while you are also busy operating a business may be challenging. There is simply not enough time in the day. Whether managing your company's day-to-day operations or focusing on your company's marketing, composing an Instagram post may be the last thing on your mind. Even those responsible for creating content and managing social media platforms suffer from the same issue.
By pre-scheduling Instagram posts, you may save time and improve your planning abilities. When you schedule your posts for the following week or even the remainder of the month within only a few hours of a single day, you up a lot of time throughout the rest of the week or month for other critical duties that require more hands-on engagement from you.
Keeping consistency
When it comes to developing a presence on social media, consistency is really essential. The Instagram algorithm will quickly learn to de-prioritize your account since you get fewer interactions if you do not actively publish new posts for your followers to engage with. This will occur if you upload new content infrequently. That implies that you end up losing exposure, and it's possible that your followers may forget about you in the long run.
It's a good idea to learn how to schedule posts on Instagram in advance if you want to make sure you publish often and at the appropriate intervals on the platform. Therefore, you should constantly have something for your followers to participate in since this is an excellent strategy to build and sustain Instagram growth.
Finding and then posting on the best times
Because there are millions of new posts produced on Instagram every day, it is simple for your post to go to the bottom of the feed if it receives interactions later. Because of this, it is essential to publish content during optimum periods, during which your followers are more likely to interact with it.
You can always be sure you are catching the best time to post on Instagram by scheduling your posts in advance. This is a terrific approach to leverage ideal post timings so that you can reach your audience at best possible time.
Keeping your plan organized
The scheduling of your Instagram posts might also assist you in maintaining order within your content schedule. If you have a comprehensive perspective of what you have planned, you will be better able to identify any changes that have been missed or spaces that exist in your Instagram content calendar. This is an excellent method for ensuring that you are making the most of significant events and keeping a healthy balance between the various kinds of material you publish.
Make a page that attracts people
Instagram users are more likely to follow a visually consistent page, whether it consists of sticking to a specific color scheme or having a decent balance of different materials.
Also, by scheduling your Instagram posts, you will get a more comprehensive perspective of your complete content schedule, which will make it easier for you to keep things consistent. You will be able to plan with this so that you can develop an aesthetically appealing grid and make an excellent first impression.
We have learned the importance of scheduling Instagram posts above, so now, let's learn how to schedule Instagram posts in 2025.
How to schedule Instagram posts with Creator Studio?
If you want to know how to schedule posts on Instagram for, there are a few ways. One of these ways is Facebook Creator Studio. Here is how to schedule by using Facebook Creator Studio:
To get started, you'll need to log into Facebook from a desktop or laptop computer. It is required that you have a Facebook business page connected to your Instagram account to plan material on Instagram. Also, don’t forget that you need a Business or Creator profile to use Facebook Creator Studio.
The following steps need to be taken to schedule posts on Instagram from your computer using Creator Studio:
You may access Creator Studio by linking your Instagram account.
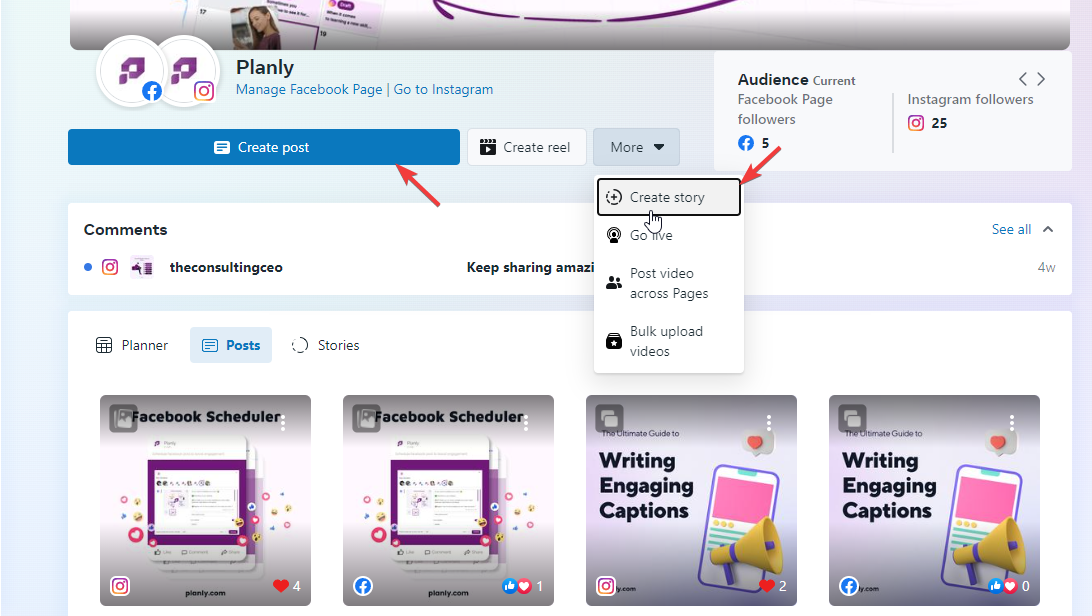
To create a new post, use the Create Post option.
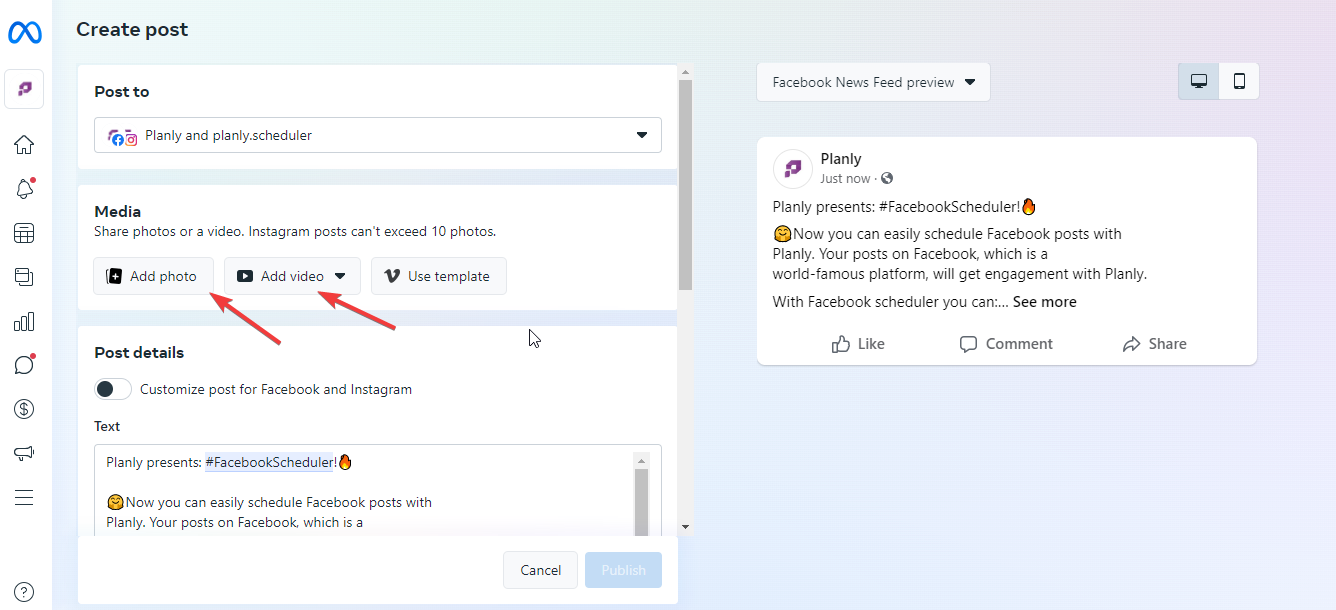
- You may submit your graphics (pictures or videos) to make a carousel post. A carousel post allows you to upload numerous assets at once.
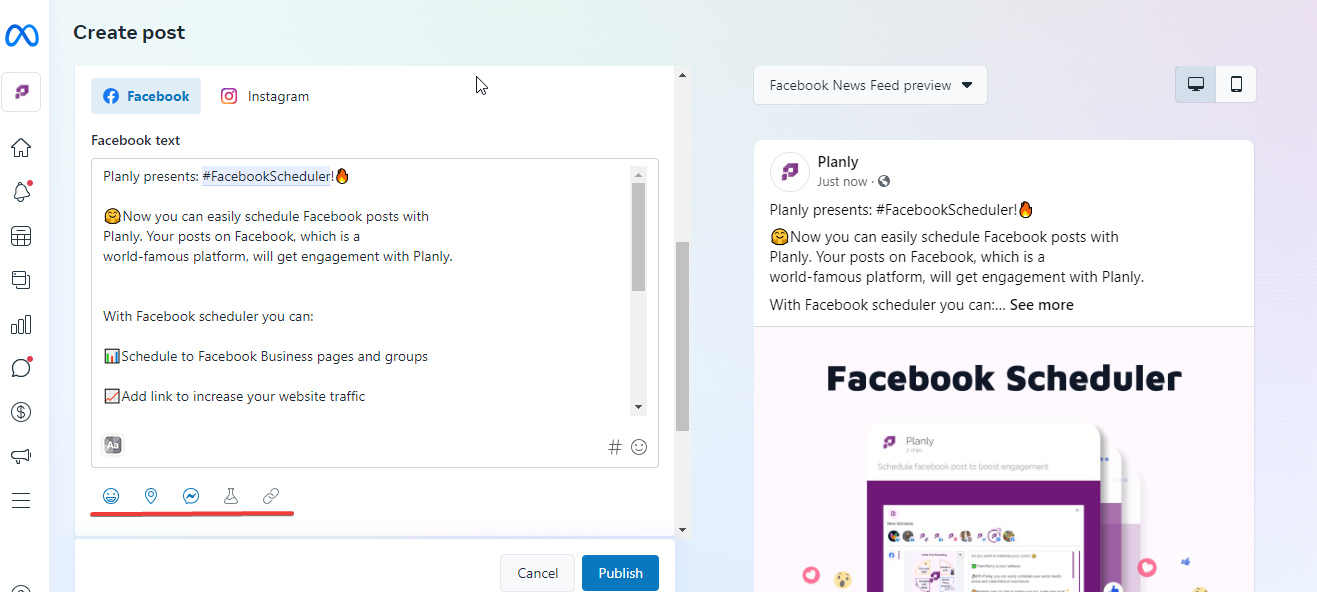
- Put together your comment (write your caption, add emojis, mentions, and hashtags).
- Select Schedule from the drop-down menu that appears when you click the arrow next to the blue Publish button.
How to schedule Instagram posts with Meta Business Suite?
To begin, you need to be sure that your company has a page on Facebook. If you do not already have one, you need to go ahead and make one.
Next, all you need to do to gain access to the Business Suite is log in to the Facebook account connected to your company. When you visit business.facebook.com on your desktop, you will instantly be forwarded to Business Suite if you are eligible for the service. You also have the option to install the Meta Business Suite app on your iOS or Android device and then launch it.
Ensure you are logged in to your business account.
You have a few distinct options for where to make posts: the Home page, the Posts and articles tab, or the Planner tab.
Simply select either the Create Post or Create Story option.
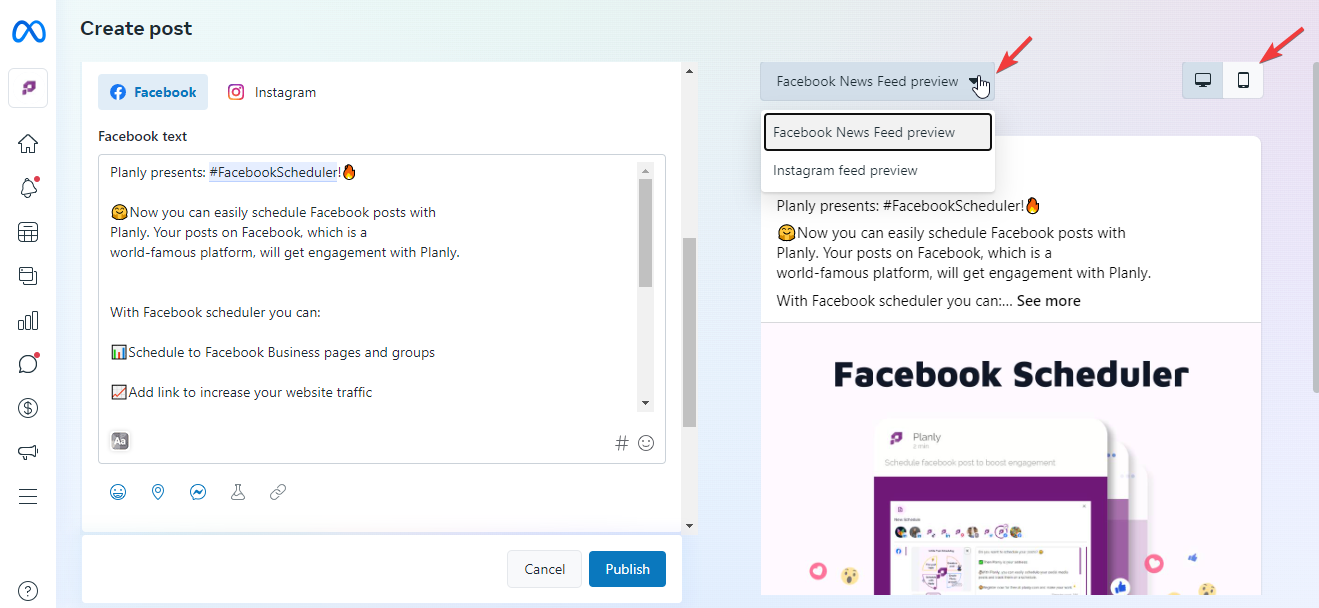
Choose the location (Facebook News Feed, Instagram Feed, or both!) where you want this post published by using the Placements drop-down menu.

To add a photo or video to a post or story that you have created, click the Upload media button.
Cropping, applying filters, adding text, and adding stickers are just some of the ways you can personalize your images using built-in creative tools.
On the right-hand side of the screen, you'll see a preview of how your post or story will appear on Facebook and Instagram.
You may post it immediately by clicking the Publish button, or you can publish it later by clicking the arrow and selecting Schedule Post or Story.
If you navigate to Posts and tales, you will be able to see a record of the post or story that you planned or published. Additionally, here is the location where you can access all past and future posts and stories. Additionally, you have the choice to view these posts using either the Feed or Grid layout.
How to schedule Instagram Posts with Planly?
If you are wondering how to schedule Instagram posts for, we got you. Scheduling your Instagram posts is easy with Planly social media scheduler. Planly is a premium social media management tool with an advanced interface and full automation.
Planly Instagram scheduler lets you store your media, plan, and auto-post to social media without notifications.
Planly helps you create a better Instagram feed and schedule your Instagram stories and Instagram reels. You can also schedule Instagram's first comment with Planly.
To start using Planly, you must create and add your social network accounts. Don’t forget that creating an account is free for 14 days.
After adding your accounts to Planly, you can start scheduling Instagram posts. You must click “New Schedule” and select at least one channel.
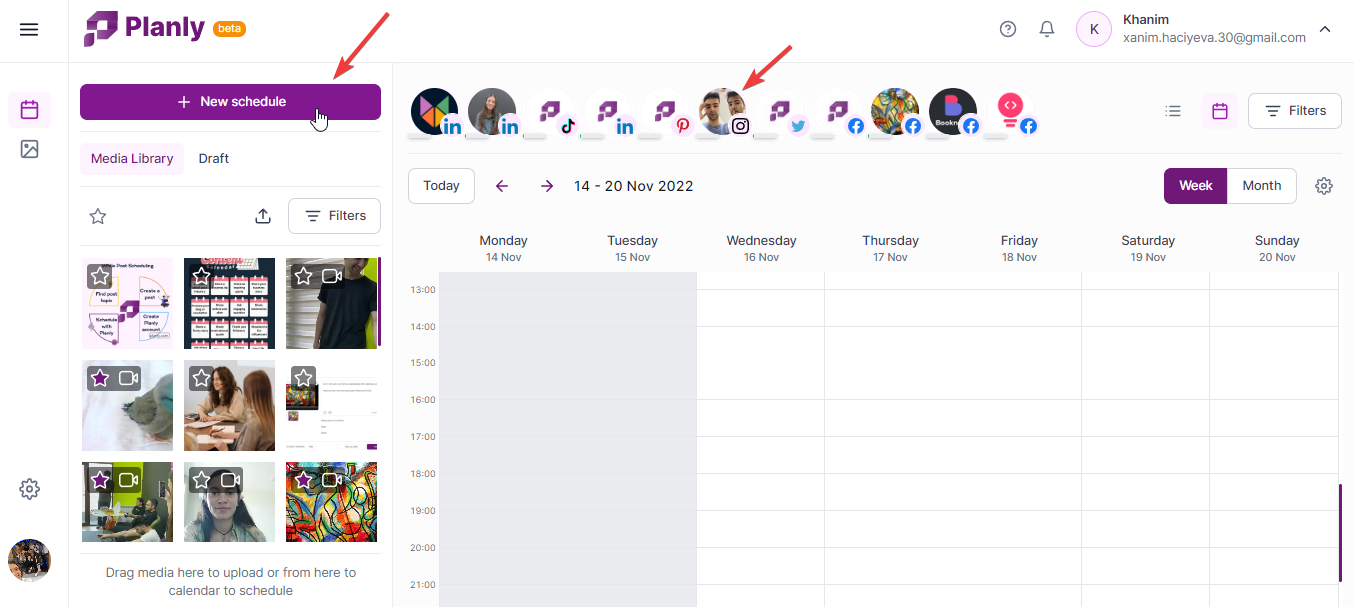
After choosing a channel, you will the “New schedule” screen like below screenshot.
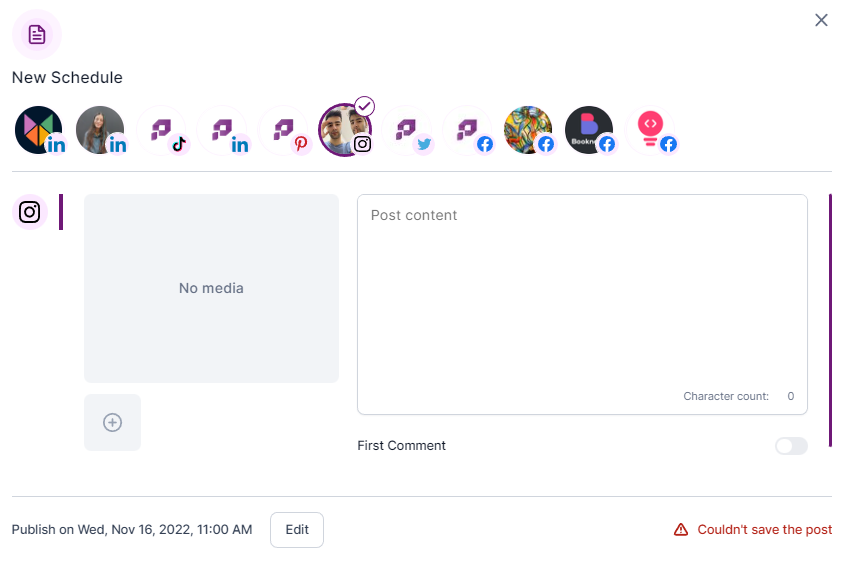
Then add your photo or videos by pressing “+” button.

After adding media now you can add your content.
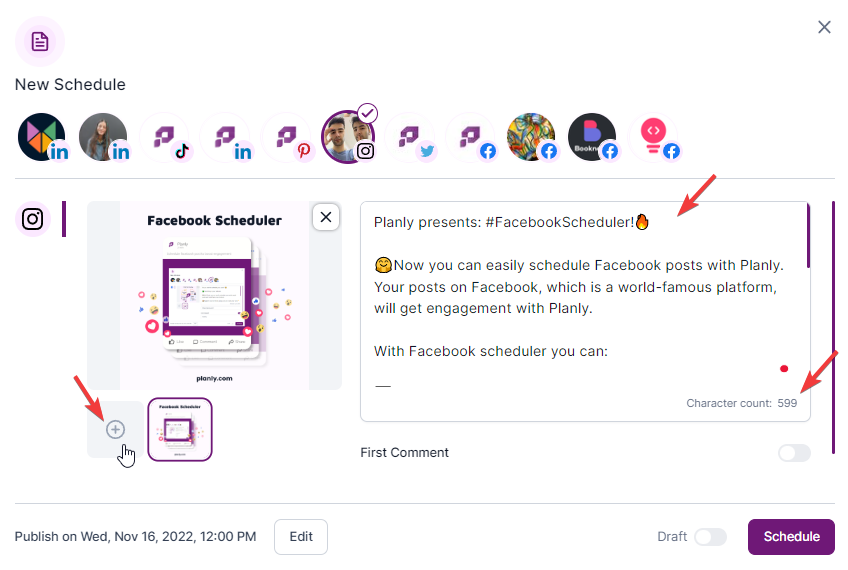
If you want to add your hashtags to first comment enable first comment button.
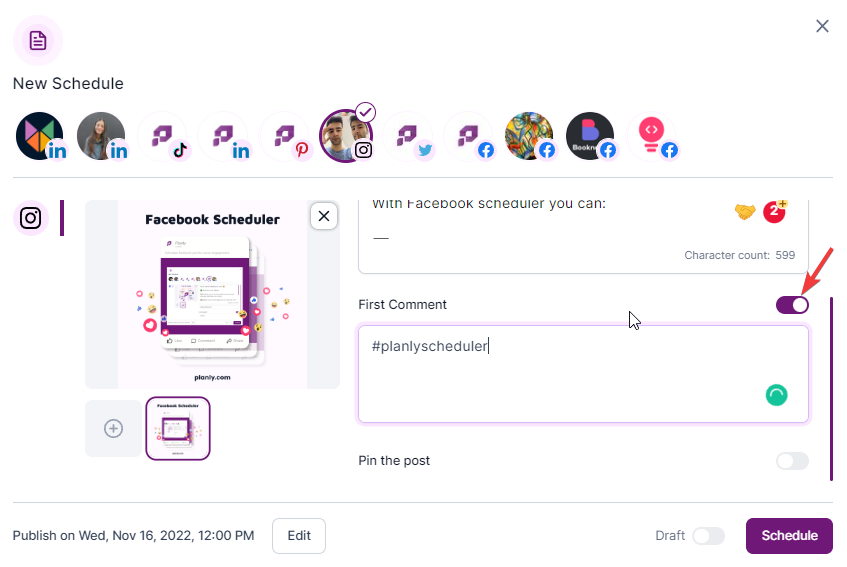
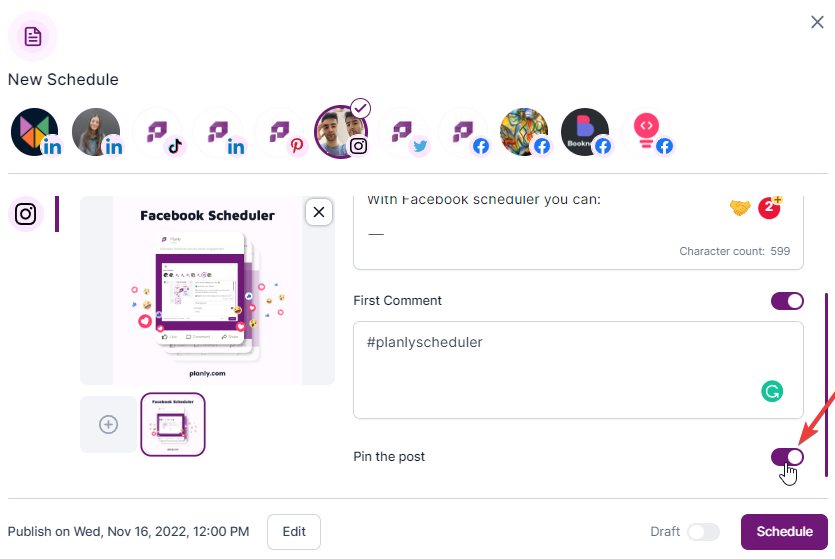
Then you can enable “pin the post” button.
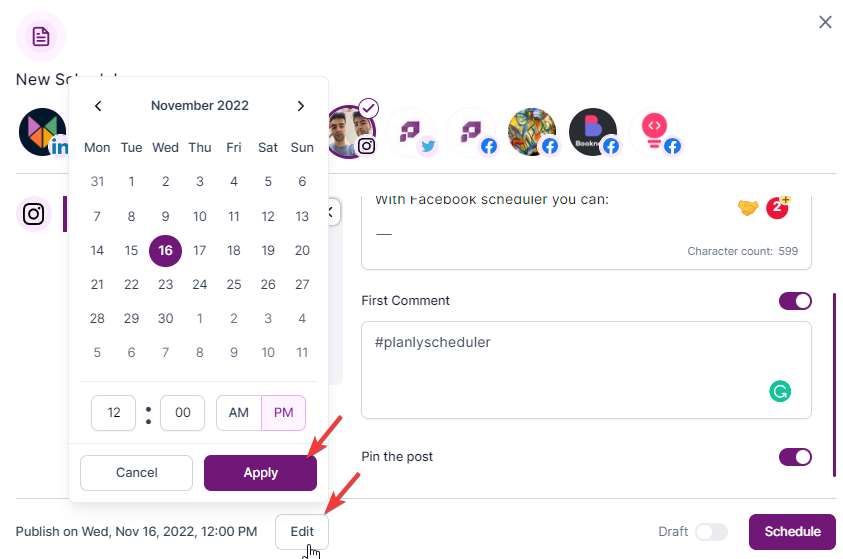
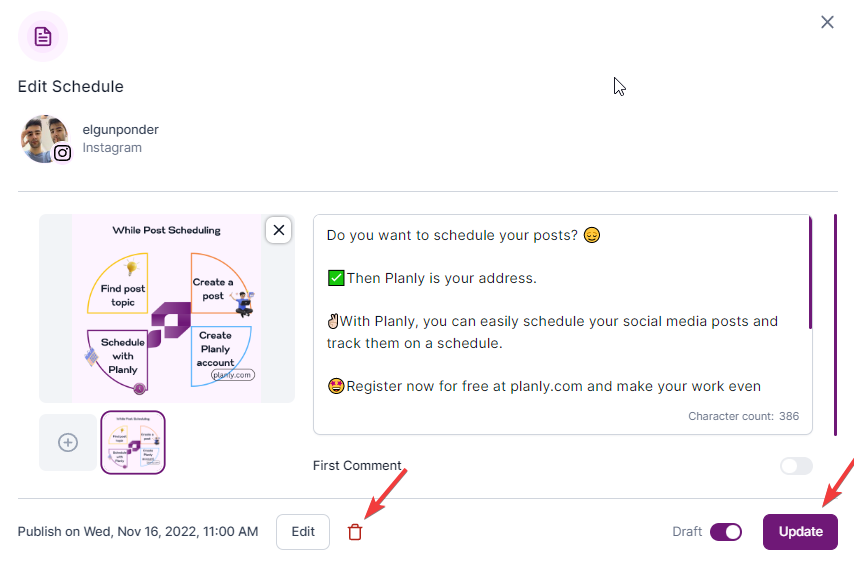
And its time for scheduling. Click the “Edit” button like the screenshot below and choose publishing date and time.
Now you can either schedule your post or make it draft for making changes later.
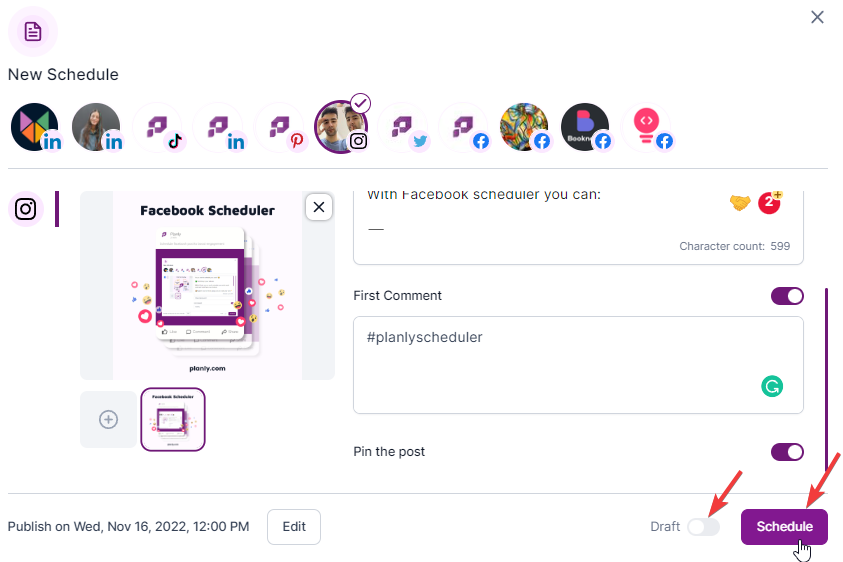
If you click the “Schedule” button, you will schedule your post to Instagram. So it means that you are done!
But If you want to make changes on your scheduled post or delete that post you need to click “Edit” or “Delete” button like below.
Conclusion
While we can’t say for sure what the future of social media holds, one thing is for certain – Instagram isn’t going anywhere. So how can you make sure your account stays active and engaging? By using a tool like Planly to help automate your posts! In 2025, Planly will still be here to help you schedule posts that look great and get results. Head over to our website now to read more blogs and learn all about how Planly can help grow your business on Instagram!
Club heritage and international football give every shirt its own connection to a place, era, and group of supporters. Selecting a Real Madrid football shirt can be a natural way to represent an enduring love of the game.